If you bought seeds from us, thank you! We hope you can fully enjoy the new plants that will born, but also take pleasure from the process to accomplish this wonderful goal. Now you may be asking “how do I germinate my seeds?”
In this article
Seed germination guide
Seed germination is a complex process and several books has been writen over the subject. There is no magic or secret formula to grow plants from seed, we just need to follow some rules and have the Nature on our side.
In this page we try to describe the procedure that we’ve been using for years growing trees and shrubs from seed. We don’t want to over simplify the process but we feel that this procedure will bring great results with the majority of the seeds that we sell.
Seed dormancy
Our seeds are usually harvested in late summer and autumn. Once harvested, the seeds are cleaned and dried. Nature protects them with a biological mechanism called dormancy, in which they are actually dormant in order to avoid their germination in periods of cold (winter) which would be fatal for the small plants. Thus, to “break” this dormancy and “wake up” the seeds, it is common to pass them through a process that is called stratification. This process is no more than simulating a rigorous winter, followed by spring.
Stratification
To force this rigorous winter, we should expose the seeds to low temperatures and some moisture. This will cause the capsule that protects them to soften and decompose, allowing the embryo to born more easily later. This process simulates what happens in Nature in winter.
You can sow your seeds outside during cold fall and winter and wait for the frost defrost to break the seeds dormancy.
The “not so natural” way to do this with great results, is to use your kitchen fridge. This is the way we do it. If you buy your seeds in advance, store them in the original dry paper bag inside a closed plastic bag in the refrigerator.
Then, 4 to 6 weeks before sowing, open the bag and add a few drops of water to create moisture. We just take the paper bag and submerge it quickly in a glass of tap water.

Do not let much water to get into the package, jut let it wet. Put the paper bag again in the plastic one, close it well and put it again in the refrigerator (don’t allow the seeds to freeze) for the 4 to 6 week period before sowing.

Seed sowing
After the stratification period in which the seeds were in the fridge, it is time to sow! As mentioned we usually start stratification during autumn/winter and sow in early spring when the temperatures start to rise for the growing season. You can sow the seeds outside until the beggining of summer. If the temperatures raise above 22ºC it is better to place the seed containers or pots in a fresh shelter.
This is our recommended and most natural periods to sow, but you can simulate them all over the year… just watch the temperature and moist and everything should work.
Trays and pots
We use seed trays for smaller seeds and small individual pots for bigger seeds. Hygiene is very important, always use new containers or clean them very well with a little bleach dilluted in water before use.
Compost
The compost has the greatest importance in the whole process, it is the bed where the seeds need to feel comfortable to grow. The golden rule for the compost is, do not allow it to be too dry or with too much water. It should be a slightly moist, fluffy and airy mixture (think of a cake, it can not be dry or slurried). We recommend to sow all the seeds in a proper compost for seed germination. You can find these quality composts for seed germination in garden centers.
Sowing in trays (smaller seeds)
Fill the tray almost to the border. Place the seeds as if they have fallen from the tree. If they have wings like Acer seeds, place the “head” down against the compost and the wing/tail up. You should lightly burry the seeds because they are small. You can also add a thin layer of compost over the seeds just to prevent them to dry or be moved by the wind or something else.
Sowing in individual pots (bigger seeds)
For bigger seeds like the ones of Ginkgos, oaks and others we ussually use individual pots. This is because they are also very much reliable and the success rate much bigger. Usually, the bigger the seeds are, the most reliable they are. Fill 3/4 of the pot, place the seed in the middle and cover it with more soil. It can’t be more simple.
Watering
After sowing, the seeds need to be watered. Use a watering can or other device that softly allows you to water the containers without moving the seeds. Water then until there is water coming out from the holes in the bottom of the container.
The tray or container should be labelled and placed in a place without direct sunlight, without wind or rain. A garage is a great place to keep them until they are born. To keep the compost and the atmosphere moist, you can cover the tray with a plastic sheet or even put the tray inside a plastic bag.
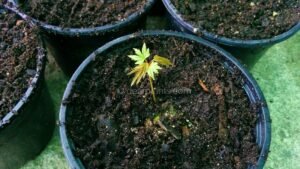
When the seeds are born, they will be very delicate. Never soak the soil with water or allow it to dry. As said, soil moisture is the most difficult and critical point in the whole process. As soon as there are small plants coming out, you should put the tray exposed to light, but avoid the direct rays of sun that can burn and kill them.
We hope this sowing guide can help you accomplish the best results. Don’t hesitate to contact us for any questions or suggestions about it.