
In this article we will show you step by step with images how to approach grafting japanese maples.
Plants of a particular variety must be propagated by methods that make the new plant maintain the characteristics of the parent variety.
This is not achieved through sexual reproduction (by seed) but by asexual reproduction methods (cuttings, layering, grafting, among others).
In this article
What is grafting?
Grafting is the method in which a portion of stem or a bud (the scion) is inserted into a “carrier” (the rootstock) so that it “sticks” and can grow independently to form a new plant.
It is often possible to propagate the variety we want using simpler methods such as cuttings, but in most cases the roots produced do not have the strength and vigor necessary to produce a good quality plant.
Thus, the rootstock is usually material germinated from seeds or cuttings of varieties that produce strong roots to have this fundamental advantage that is the strength of its roots.
Probably grafting would have been invented when man saw that crossed branches of trees managed to come together.
This approach graft method is the one that best represents that image. Two trees that grow close together and there are branches that touch and stick together.
In my experience it is the easiest and safest grafting method because both plants are attached to the roots until the graft is ready. However, it is little used for propagating plants commercially because it is more time consuming. If you want to learn a different method, check this external good article by Mike McGroarty.
Let’s see step by step how to do it, we are grafting Japanese maples, an Acer palmatum ‘Sango-kaku’ on an Acer palmatum grown from seed. These maples are the favorite trees for Japanese gardens.
We did this graft in mid-spring, when the leaves are already well established, however you can do it in the dormancy period, in late winter or early spring.
Select the plants
First, choose the plant you want to propagate and the plant that will be the rootstock. In this case, we are using two Acer palmatum trees that are in pot. The fact that they are still planted in a pot makes the process much easier.
Choose the branch that will form the new tree. Choose a straight and vigorous branch. Then, choose the rootstock’s branch on which to attach the scion. The most important thing is to choose a branch with the same caliber so that they come together in line.

You may need to raise one of the pots with a support for the two branches to be aligned and at the correct height, be creative.
Take the time to ensure that you have chosen the branches well, that they come together naturally and that there will be little pressure when they are tied together.
If you need to apply a lot of strength to join them, choose other branches or rotate the pot. This pressure can easily break your graft on a windy day.
Prepare each branch
Once you are satisfied with the position of the pots and branches it is time to make the cuts. Make an incision of about 5 to 7 cm in each of them at the point where they will be touching as shown in the images.
Use a very sharp knife to make a clean cut.

Join and tie the branches together
Join the branches well aligned and tie them tightly together. You can use raffia or grafting tape. Do not use wire or other rigid material as they may strangle the graft as the branches form callus.


Protect the graft
Finally, protect the graft. You can apply proper healing paste for grafts or, as we did here, electrician’s tape is just perfect for this purpose.

Place one or two long stakes that support the branches. At the point of grafting the branches are fragile and the wind can easily break them.
Take care of the grafted trees
In the following months keep the trees hydrated and fed so that they grow well, form callus and the graft can heal.
In the rootstock tree, any branch that sprouts below the graft point should be removed. Remove these “thieves” so they do not weak the upper part of the plant that needs to generate energy for the graft.
When to separate the graft?
This depends a lot on the species and the vigor of the grafted plants.
It is necessary to check from time to time and verify that the graft is not being strangled. Check that the wire is not hurting the skin. If so, cut it out and assess whether a new one needs to be added.

We usually keep the graft for an entire year, but it is possible to separate it earlier depending on the growth rate.
Do not cut too early, as you may throw down all your effort and time. It is preferable to let it stay longer to heal properly.
How to separate the graft?
In autumn or early spring, cut the branch of the scion below the graft point and the rootstock branch above the grafting point.

You will then obtain a new tree that will have the same characteristics of the parent plant above the grafting point. In this case, the main characteristics of Acer palmatum Sango-kaku are the autumnal colors of the leaves and the branches that presents intense red color in autumn and winter.
In the next growing season, pay attention to the graft development and continue to cut any bud that appears below the grafting point.
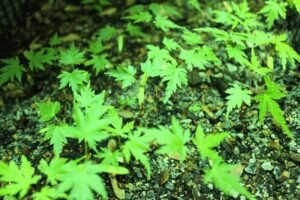
The following images are of the grafted japanese maple in the fall, about a year and a half after grafting.


What did you think of this guide on how to approach grafting japanese maples? Have you any questions? Don’t hesitate and talk to us in the comments section below. Thank you.
Does the same principle apply to grafting Acer japonicum aconitifolium (peacock maple). I tried to graft one to common Japanese maple root stock, but wasn’t successful. Have you any extra tips for grafting this variety? I live in Australia in a mountainous region so the climate is very kind to Japanese maples).
Regards
Darryl
Hi Darryl, yes, the same technique (approach grafting) can be used to propagate Acer japonicum cultivars.
Now, the question is “Can Acer palmatum rootstock be used for Acer japonicum cultivars?”
Last year, I’ve read it is possible and I did a trial. I didn’t “open it” yet to see if it glued… I will check it soon and update here.
Regards!