Yews have been used in gardening for centuries. In this article I will show you step by step how to propagate Irish Yew from cuttings. Specifically Taxus baccata ‘fastigiata’ by hardwood cuttings.
I love hardwood cuttings as it is the “laziest” way to propagate plants.
Yew is often used to form hedges and to make topiary. Its dark green foliage becomes extremely compact with regular pruning.
This characteristic makes this plant an excellent choice for a background plant in a composition. Its dark color will enhance any plant with colorful foliage or stems that is planted in front of it.
Furthermore, being a perennial shrub, it has interest all year round, giving structure to the garden even in the winter months.
The Taxus that I will propagate in this guide is a Taxus baccata ‘fastigiata’ commonly known as Irish yew. This is an erect, very formal variety that has been growing in my garden for many years.

Yews are slow growing shrubs in the first few years, but once established in place, they become vigorous growers.
Yew have lost some of the popularity it once had. In my opinion, its resistance and longevity, in addition to its natural beauty, make it a plant that has a place in any garden.
With this introduction to the plant, let’s go without further ado to our step-by-step guide.
Hardwood cuttings are obtained from mature branches, stems that have grown for an entire season and are cut at the end of the growing season, that is, from late autumn through winter.
In this article
Prepare the pot
The first step is to prepare the pots. I used my usual cuttings mix, generic potting soil mixed with sand.
One of the most important factors for successful propagation by cuttings is good drainage in the cuttings bed.
If we use a soil that retain too much moisture, the cuttings will rot.

Here I used small square cultivation pots, but you can do it in a deep tray or other container that may be more convenient to you. As long as it has good drainage holes it is fine.
How to take the cuttings
I cut several stems. I don’t think it’s essential, but I made sure that all of them had apical buds (at the tip) and not just side buds.

With my fingers, I removed the leaves and buds on the lower two-thirds of each cutting. I made the final cut with a very sharp blade just below a node. In this case, the point where this last year’s growth started.
It will be at this point that the roots will grow.

Plant the cuttings
I buried the cuttings around the pots, leaving only the small tuft of leaves and buds above the soil.
I didn’t use any kind of rooting hormone.

Water and protect
Then, I watered the pots well and put them in a place protected from the wind and direct sun. You can place them next to a wall or other taller pots that provide some shelter for the cuttings.

Now just wait for Nature and time to do their work. Yew cuttings can take a long time to root, at least a year.
Do not transplant them until you can clearly see white roots coming out of the bottom of the pot. Don’t be fooled by possible aerial growth of cuttings that can happen even without roots.
Yew tree propagation, did it work? Check the results…
In the spring of the second year after take the cuttings, I see roots in the bottom of the pot.
There have been many cuttings that have failed, so it’s always good to take many cuttings of the species that have a lower success rate (at least for me).
I chose this pot as a good example, it has three successful cuttings to demonstrate here.
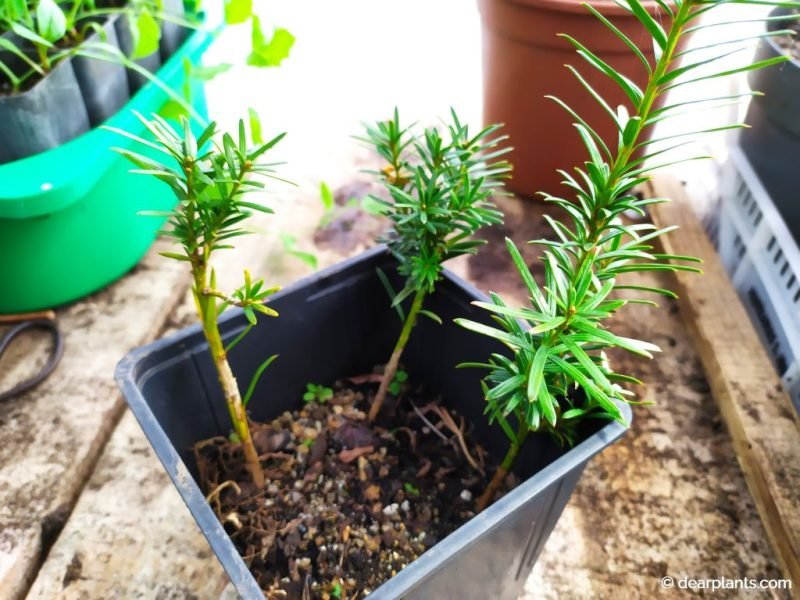
It’s time to separate and pot the new yews individually.
I always prefer to plant perennials in early spring. Deciduous plants are often potted in the fall or throughout their dormant period.
As you can see, the aerial part has not developed much. However, it is the underground part that interests us. It is important that there are good roots so that new plants can establish quickly and develop from there.
Plant the new yews
I remove the plants from the pot, and carefully separate them.
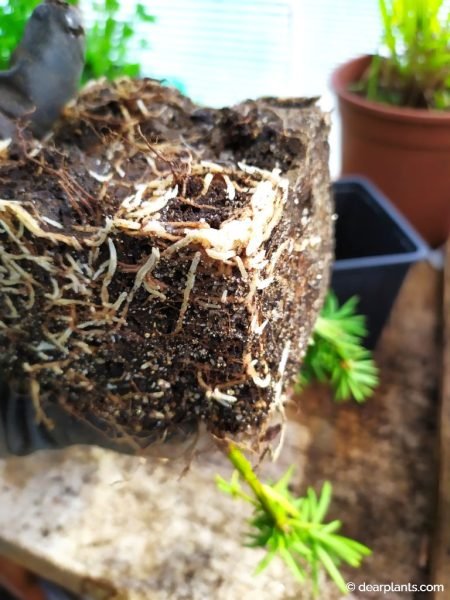
A chopstick can be useful at this stage to untangle the roots.
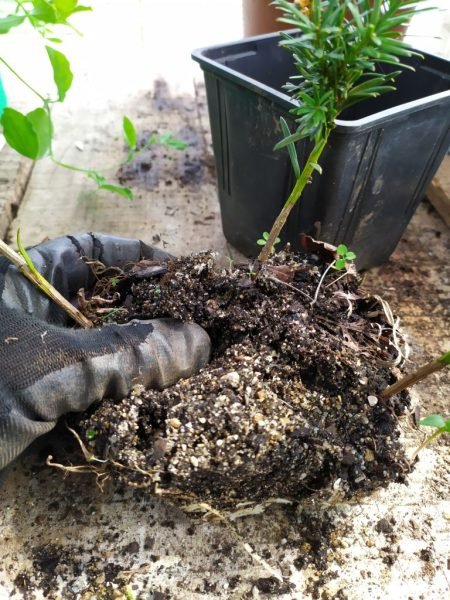
Notice how well the cuttings rooted. They have everything to grow strong!
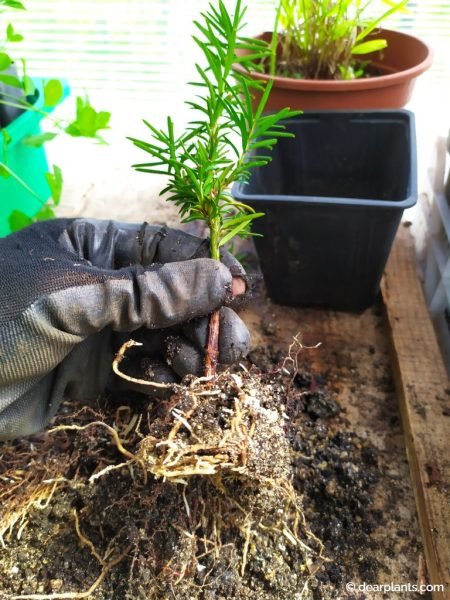
Now, I fill a pot with generic potting compost, add the yew plant and top up with more compost all around the roots.
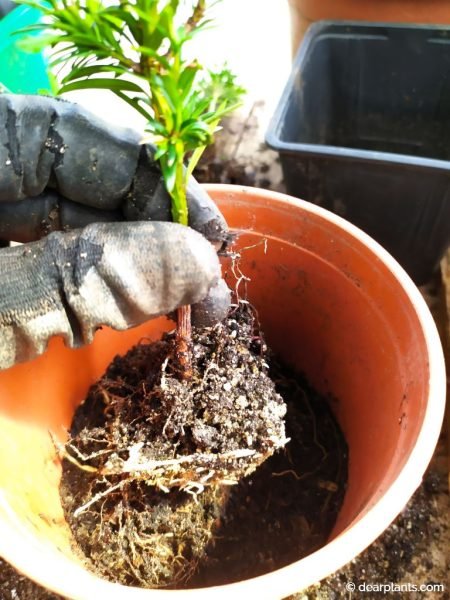
I compact the soil slightly just so that the plant is stable in the pot.
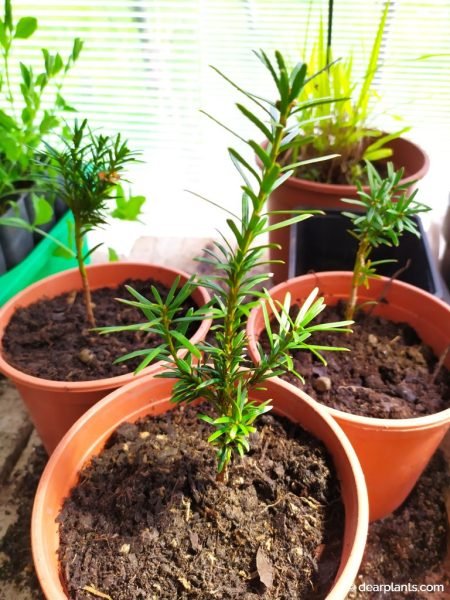
Finally, I watered the pots and placed them outdoors in a relatively sheltered place until they show signs of new growth.
Did you like this guide on how to propagate yews by cuttings? Leave your comment. Thank you!